
How To Exchange Tickets
Follow the same steps below for desktop, tablet and Android devices.
For a refresher on how to sign into AccountManager, click here.
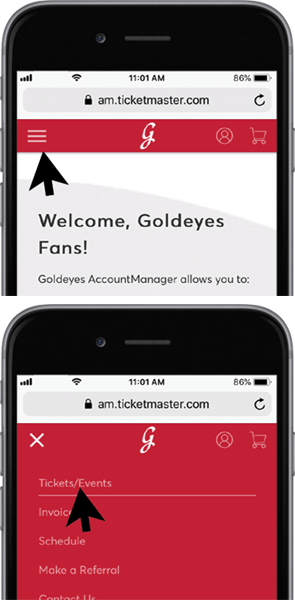
Step 1
Once signed in, click “Tickets/Events” from the menu.
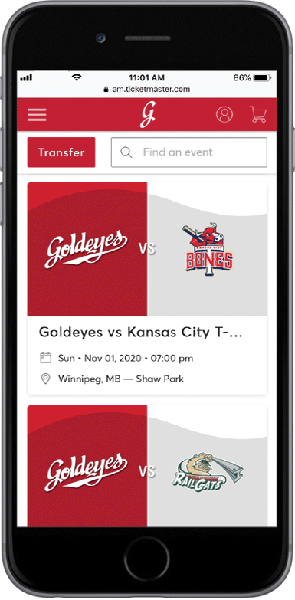
Step 2
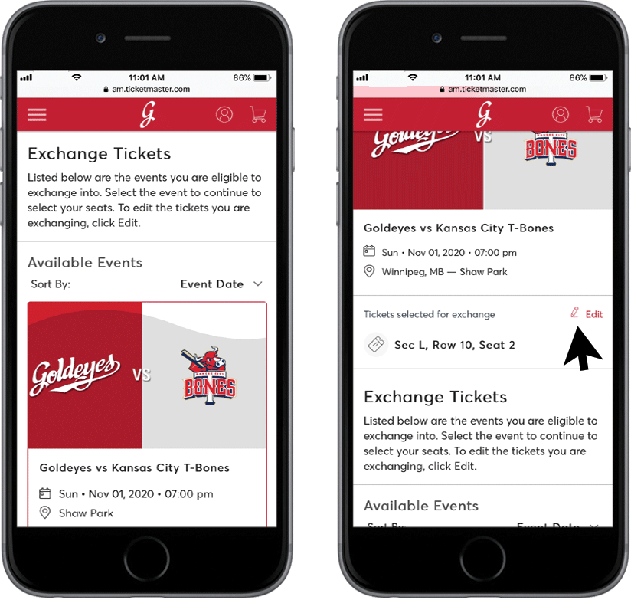
Select the event to exchange.
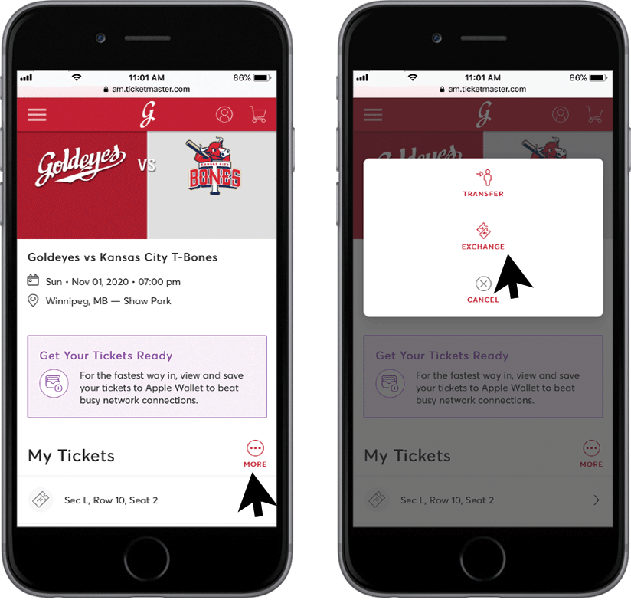
Step 3
Beside My Tickets, tap/click the More icon, then tap/click Exchange icon.
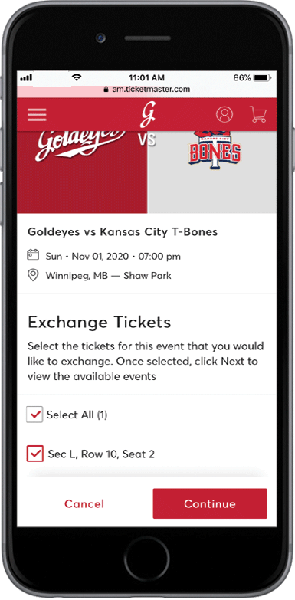
Step 4
Select the tickets to exchange. Tap/click “Continue“
Step 5
Scroll through and tap/click to select the new event.
TIP:
To change the tickets for exchange, scroll to the top of the list, and tap/click the Edit icon beside the original tickets.
Step 6
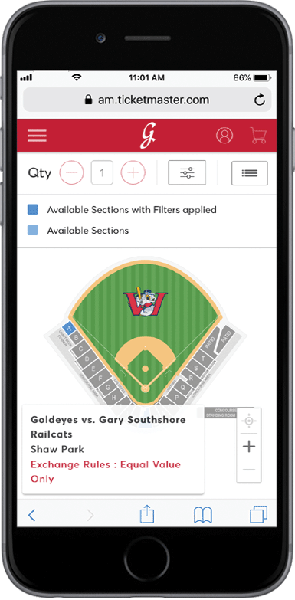
From the Interactive Seating Map (ISM), tap/click on a section and seat location to select your new seats.
TIP:
In the ISM, tap the + or – icons to zoom in and zoom out.
WARNING:
You are not allowed to add or drop seats. You must leave with the same number of seats that you selected to exchange.
Equal value exchanges only. This rule requires your new seats to be the same value of your current seats.
TIP:
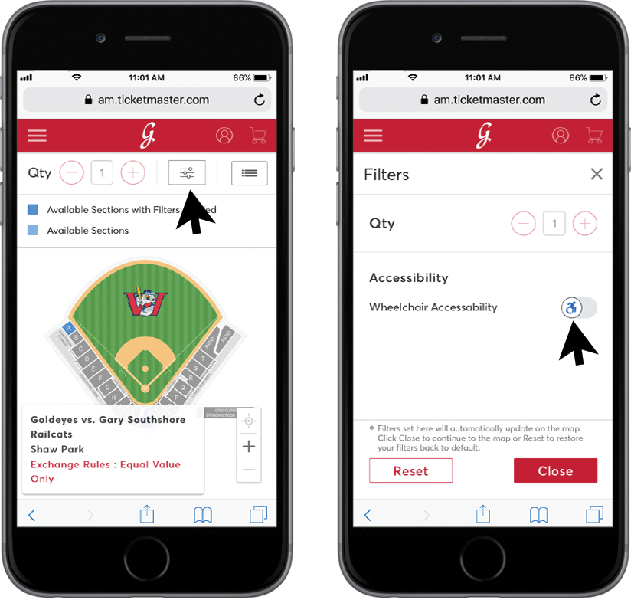
To isolate wheelchair accessible seating, tap/click the Filters icon above the ISM.
Under Filters, tap/click the Wheelchair Accessabilty toggle. Tap/click “Close“.
TIP:
To view the seating options as a list rather than a map, tap/click the List icon above the ISM.

Step 7
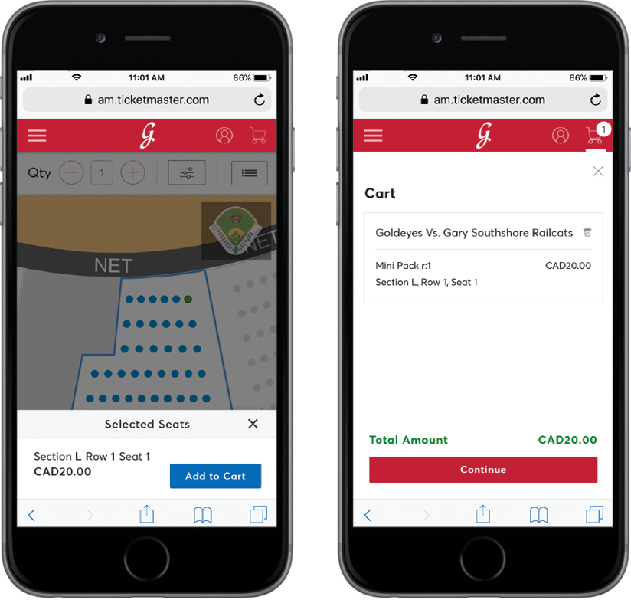
Choose a seat location, then tap/click “Add to Cart“. When ready, tap/click the Shopping Cart icon in the top right corner.
In the cart, confirm your new seat. Tap/click “Continue“.
TIP:
To choose a different location, tap/click the Trash icon.
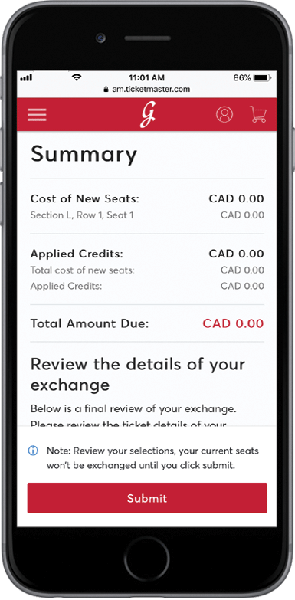
Step 8
Scroll through the summary to verify the details of your exchange. When ready, tap/click “Submit“.
TIP:
Exchange details can be adjusted at this stage.
To select a new seat location, tap/click “Edit” beside New Event.
To exchange a different event, tap/click “Edit” beside Event Selected for Exchange.
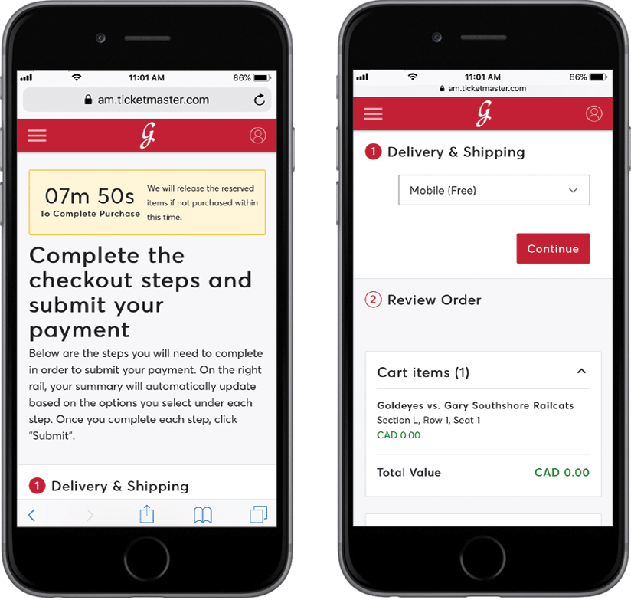
Step 9
Scroll through to complete the checkout.
Under Delivery & Shipping, select “Mobile (Free)“. Tap/click “Continue“.
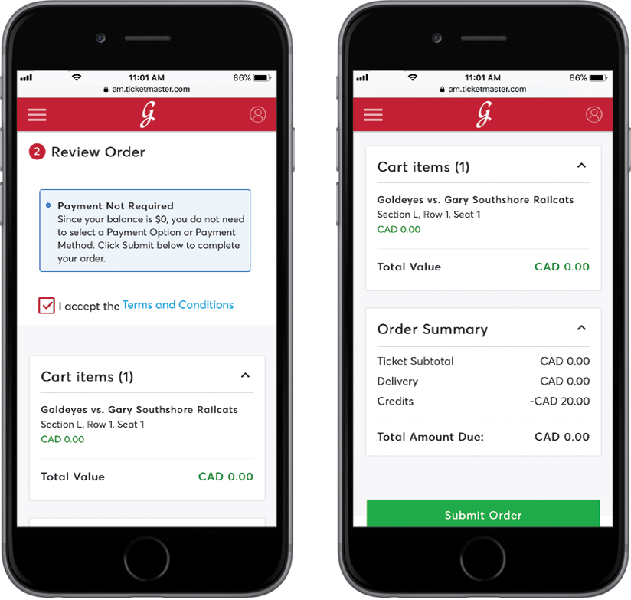
Accept the “Terms and Conditions“. Scroll further and tap/click “Submit Order“.
TIP:
Payment not required for exchanges.
WARNING:
You have 8 minutes to complete the checkout process.
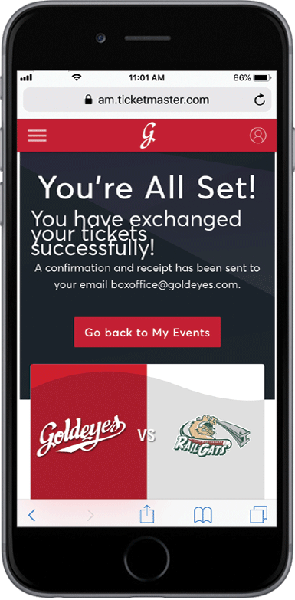
Step 10
You will receive a confirmation page and email.
TIP:
Exchanges can be reversed by following the same steps outlined above.


Administration Office
- Mon - Fri
- -
- Sat - Sun
- Closed
Team Store
- Mon - Fri
- -
- Sat - Sun
- Closed
ShopGoldeyes.ca is available 24/7.
Ticket Office
- Mon - Fri
- -
- Sat - Sun
- Closed
Account Manager is available 24/7.
Blue Cross Park is located on Treaty One lands, the original territories of Anishinaabe, Cree, Oji-Cree, Dakota, and Dene peoples, and the National Homeland of the Red River Métis.